
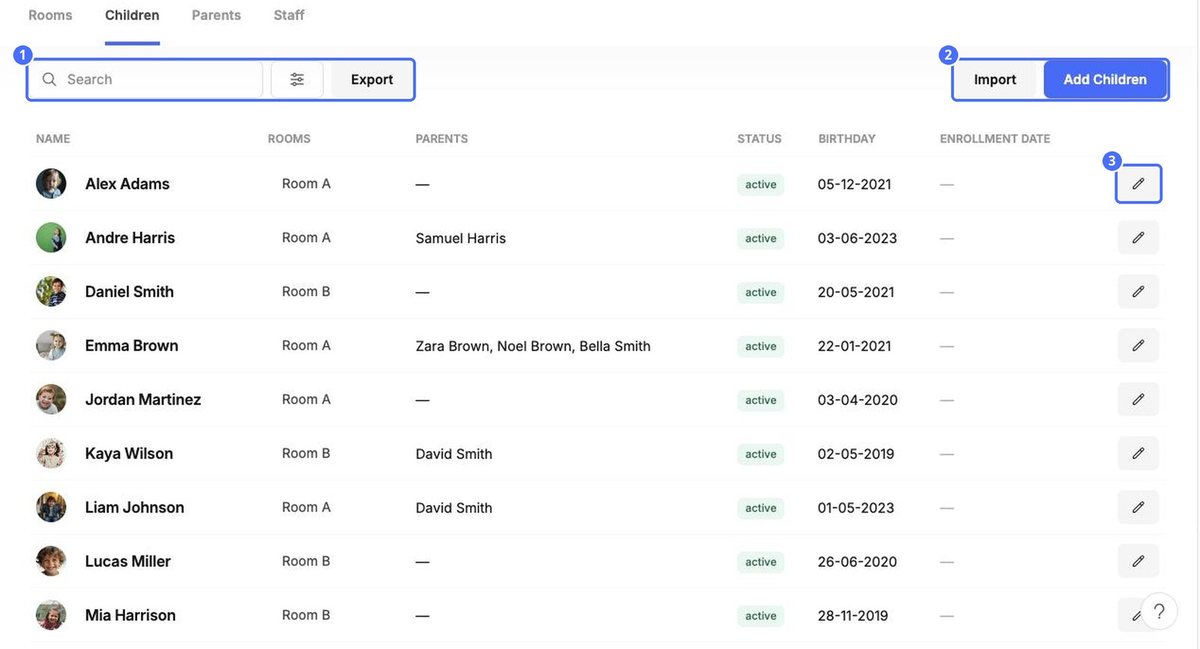
School › Children lists every child with their room, parents, status, birthday and enrollment date.
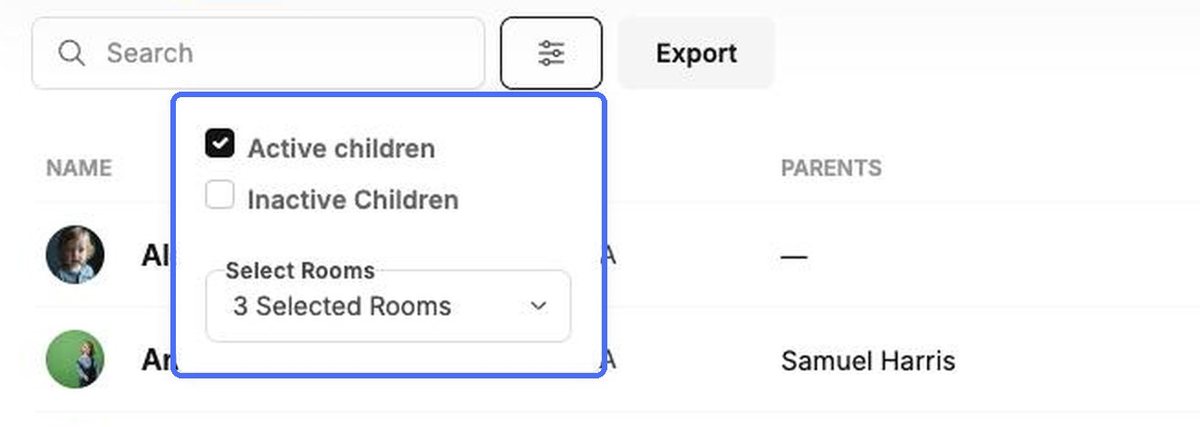
- Filters. Click the filter icon to show Active children, Inactive Children or both, and to limit the list to certain rooms.
- Export. Download the current list, for example to share with your accountant or local authority.
- Open a profile. Click a child's photo to open their profile (see the topic “The child profile”).
Add children
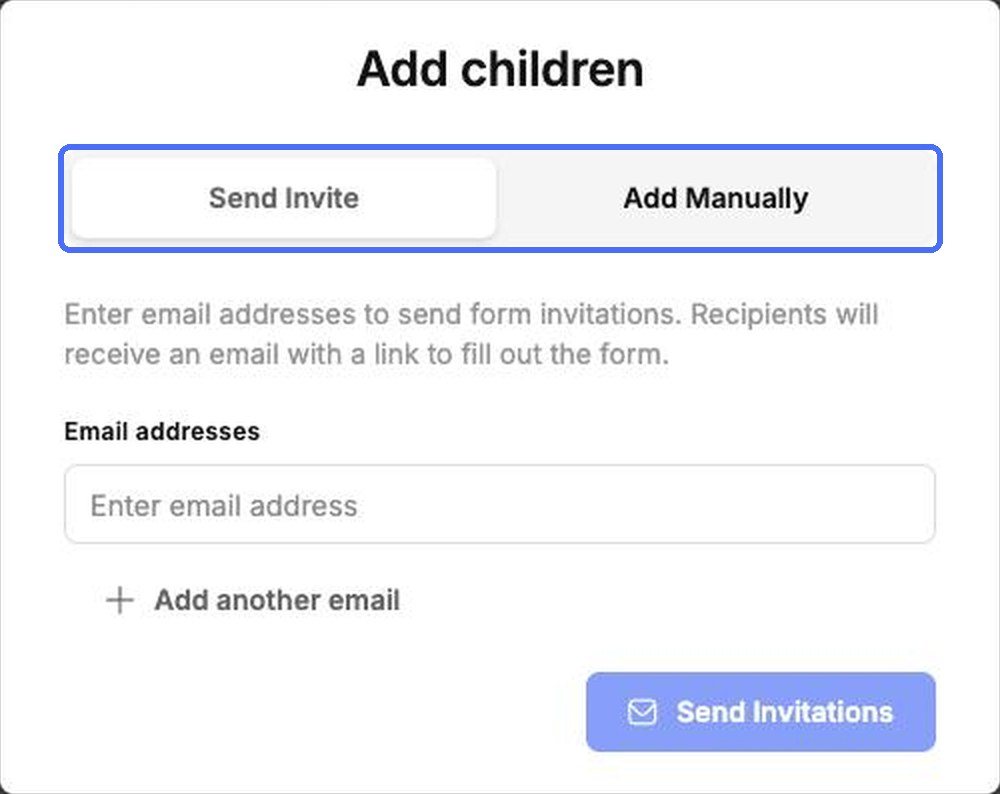
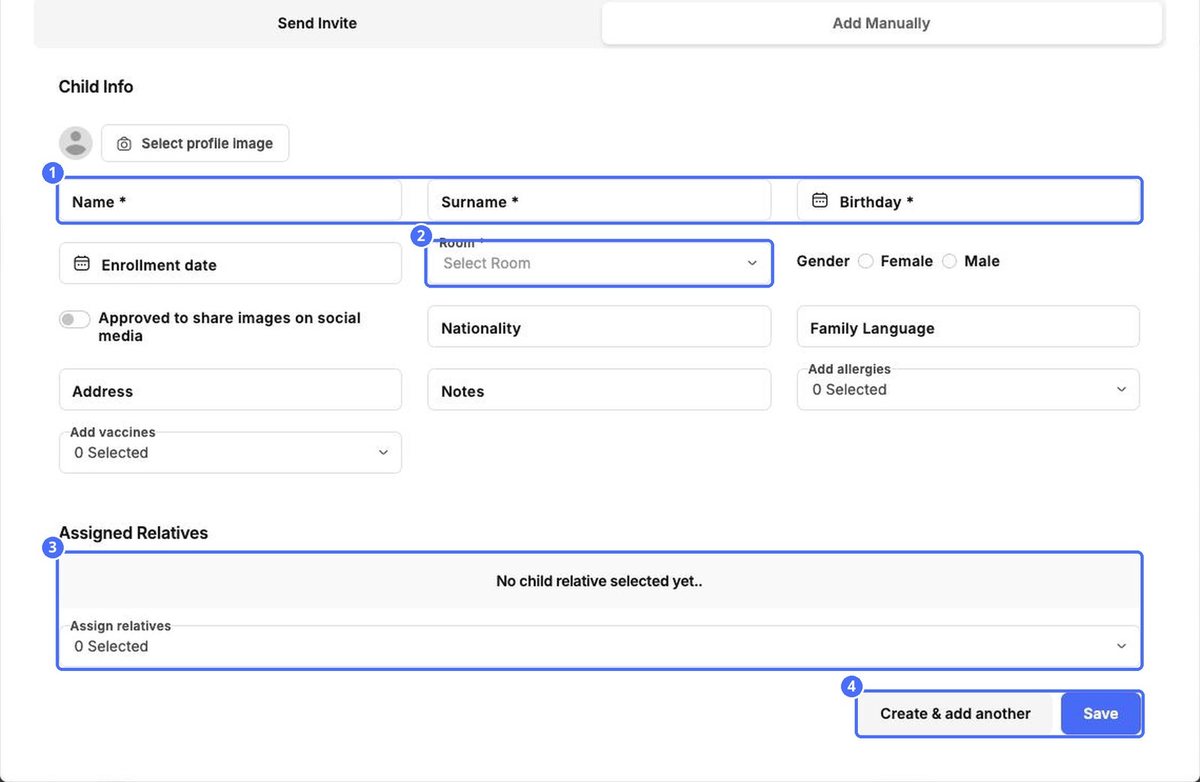
Click Add Children and choose how you want to add them.
| Option | When to use it |
|---|---|
| Send Invite | The family fills in the details themselves. Enter one or more email addresses and click Send Invitations. Each recipient gets an email with a link to the form. |
| Add Manually | You have the details to hand and want to enter them yourself. |
| Import | You're moving many children from another system or a spreadsheet. |
- On the Add Manually tab, enter the child's Name, Surname and Birthday, and choose their Room. These are required.
- Add anything else you know: photo, enrollment date, gender, nationality, family language, address, notes, allergies and vaccines, and whether photos may be shared on social media.
- Under Assigned Relatives, link the child's parents.
- Click Save, or Create & add another to continue with the next child.
Import children from a spreadsheet
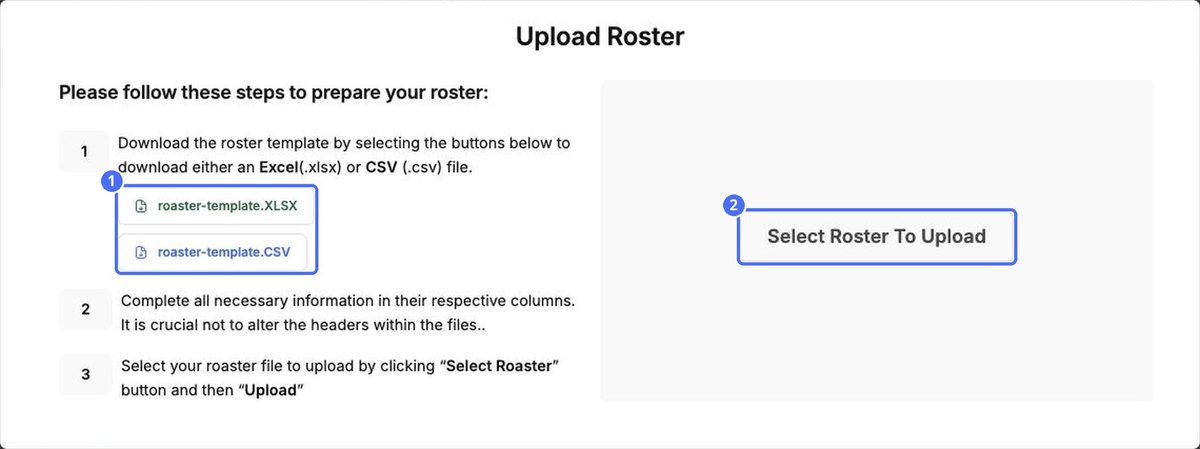
- Click Import.
- Download the template as an Excel (.xlsx) or CSV (.csv) file.
- Fill in one row per child. Don't change the column headers.
- Click Select Roster To Upload, choose your file and upload it.
Edit or deactivate a child
Click the pencil icon on a child's row to open Edit Child Info. Here you keep allergies, vaccines, photo consent and family links up to date.
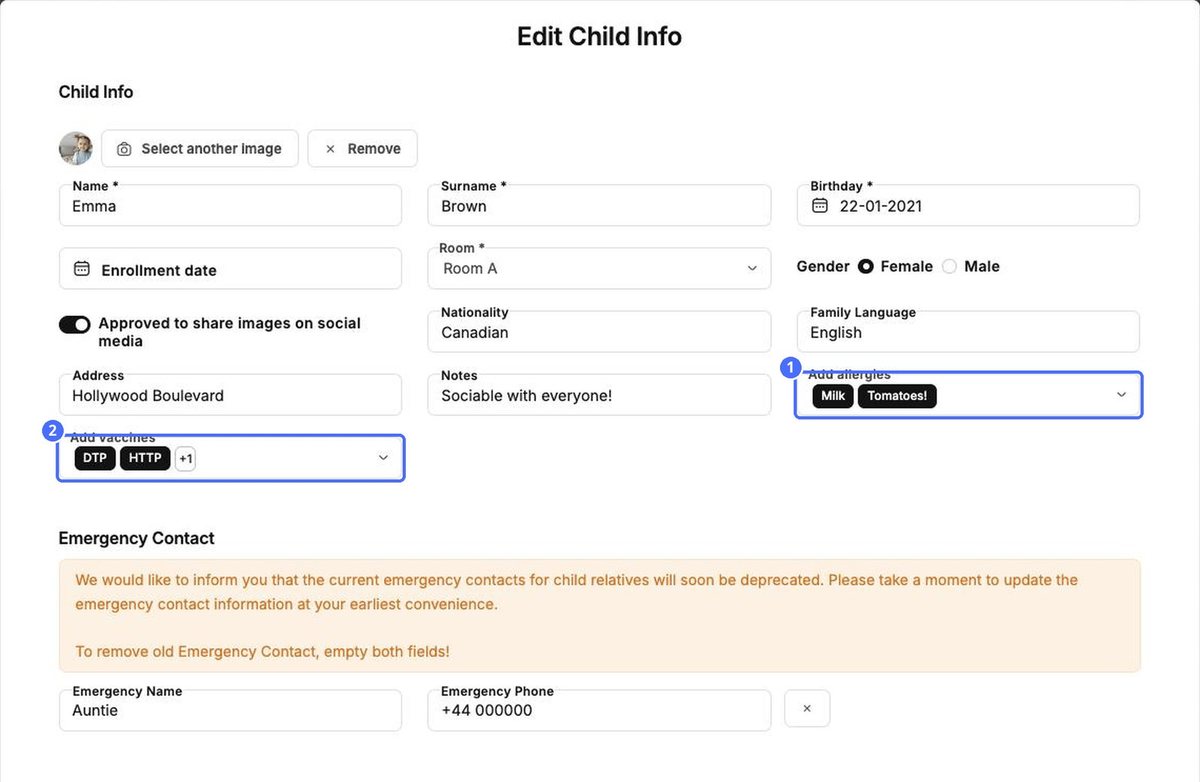
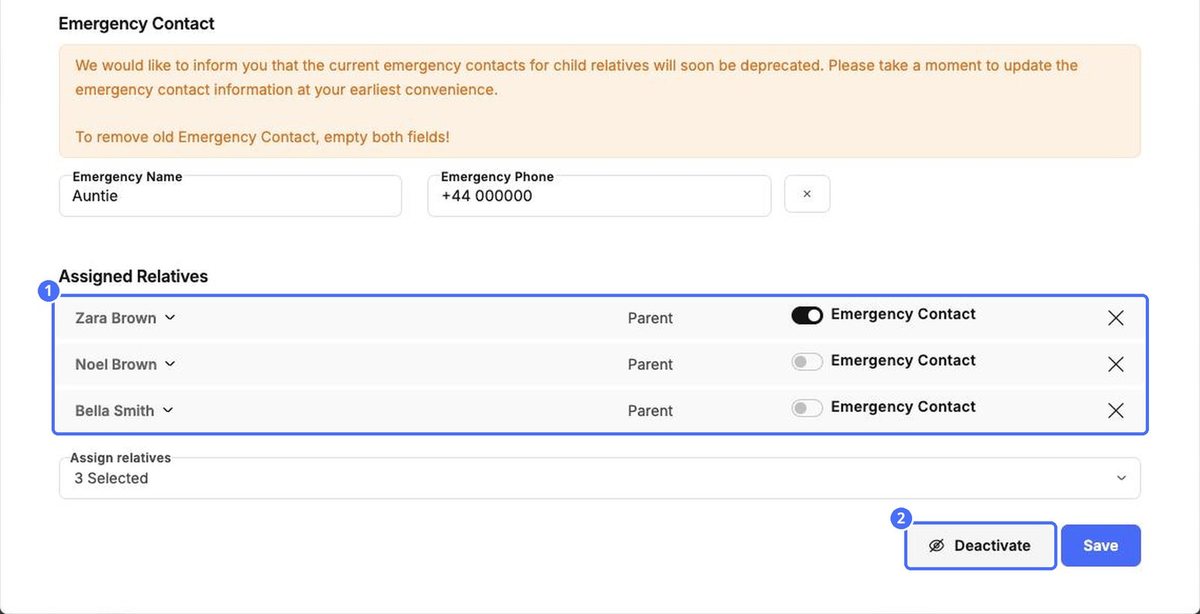
- Emergency contacts. Turn on Emergency Contact for each relative who should be called in an emergency. The separate Emergency Name and Phone fields are being retired, so move those details to a relative and then clear both fields.
- Deactivate. When a child leaves your center, click Deactivate. The child no longer appears among active children. Use the Inactive Children filter to find them again.