Learning brings together everything you plan and observe in the classroom. It has five tabs:
| Tab | What you do there |
|---|---|
| Activities | Plan the activities for each day of the week, by age group and room. |
| Observation Forms | Build the checklists teachers use to observe children, plus milestones and assessment levels. |
| Library | Keep reusable lesson plans and browse plans shared by the kidsday community. |
| Home activities | Send activities home and check who has done them. |
| Settings | See your AI Lesson Planner subscription and choose whose activities need approval. |
Plan the week
The Activities tab shows one week as a grid: days across the top and age groups down the side.
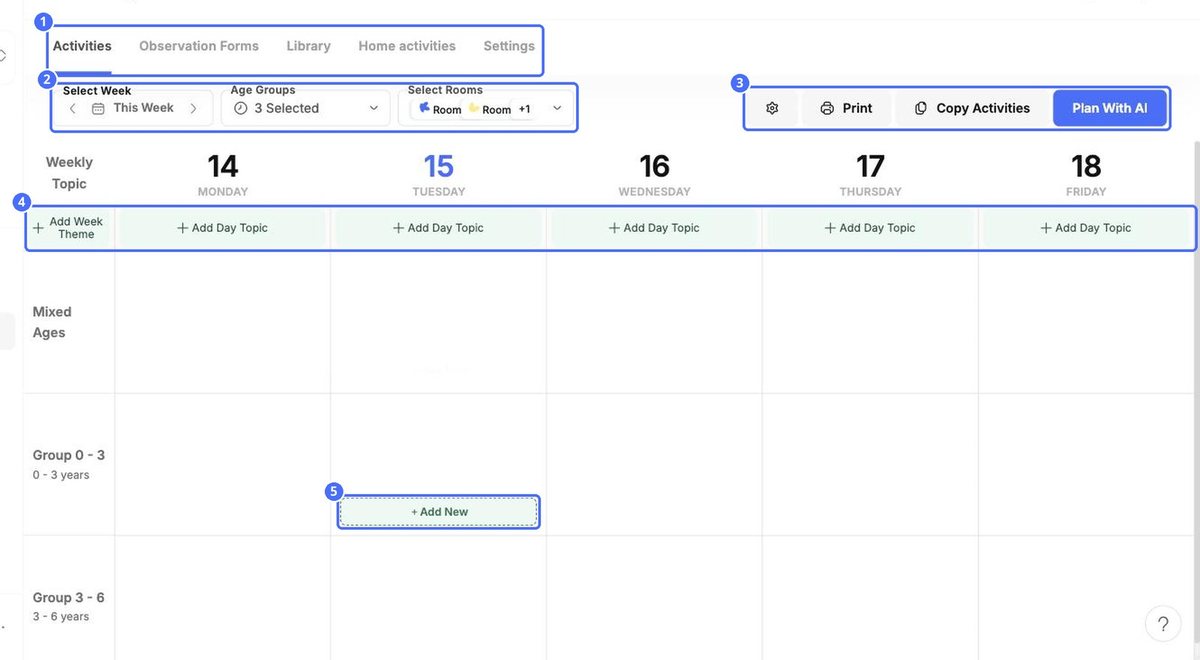
- Select Week: use the arrows to move between weeks.
- Age Groups and Select Rooms: choose which groups and rooms to show.
- Add Week Theme: type the theme of the week, for example Nature & the Garden.
- Add Day Topic: give each day its own topic.
Add an activity
- Point at a cell in the grid and click + Add New.
- Enter the Activity name and a Description.
- Click Choose an Image to add a photo or picture.
- Choose the Materials Needed and write the Steps to follow.
- Click Define Development Topics to link the activity to learning areas.
- Check Select Rooms. Tick Don't show to parents to keep the activity for staff only.
- Click Save.
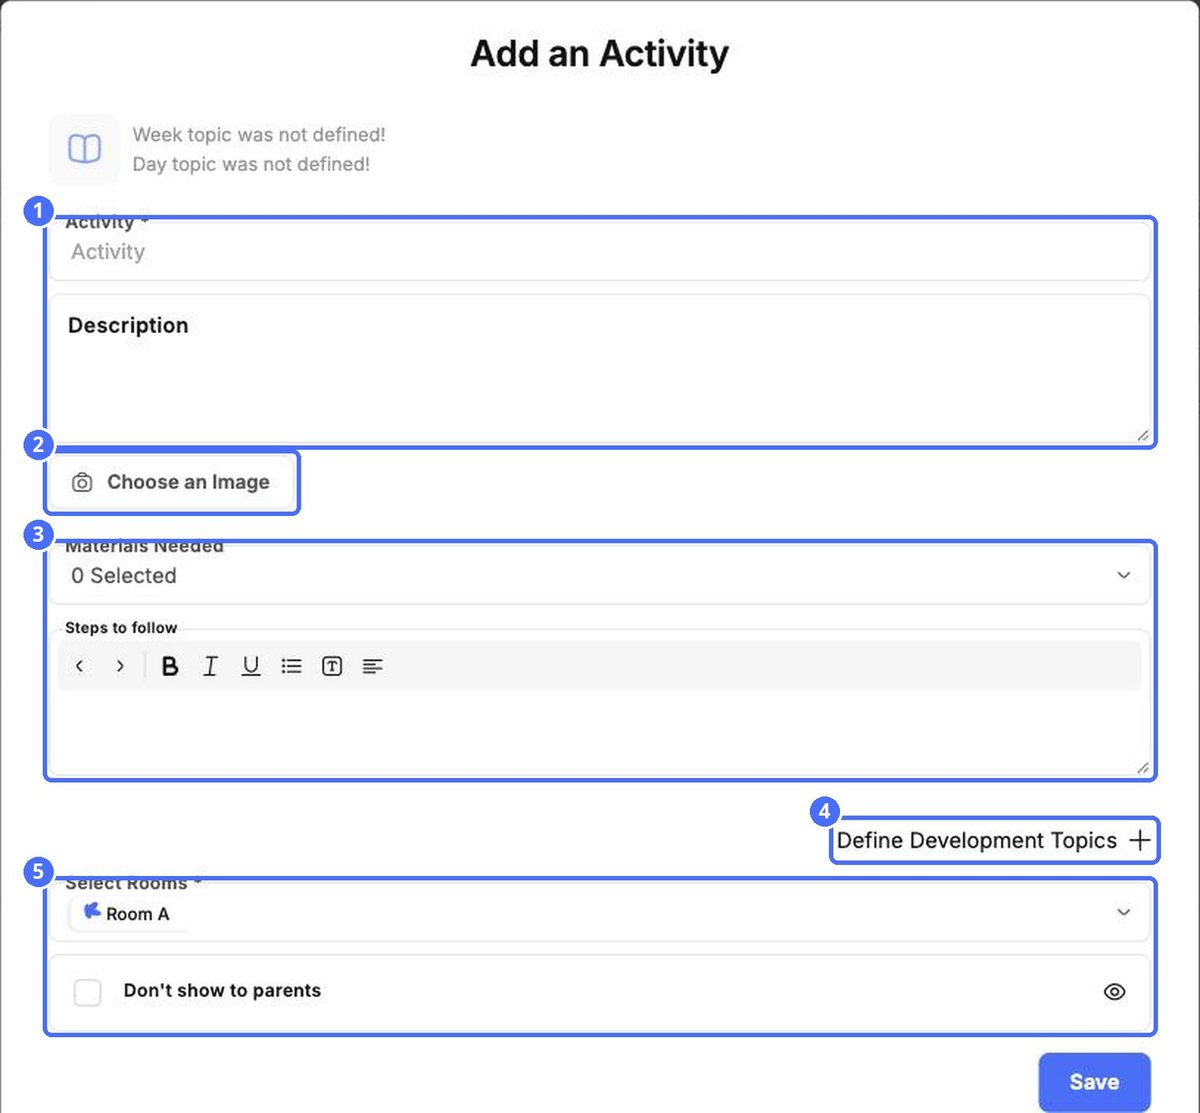
Tip: The top of the window shows the week theme and day topic. Set them first so every activity fits the week.
More options
| Option | What it does |
|---|---|
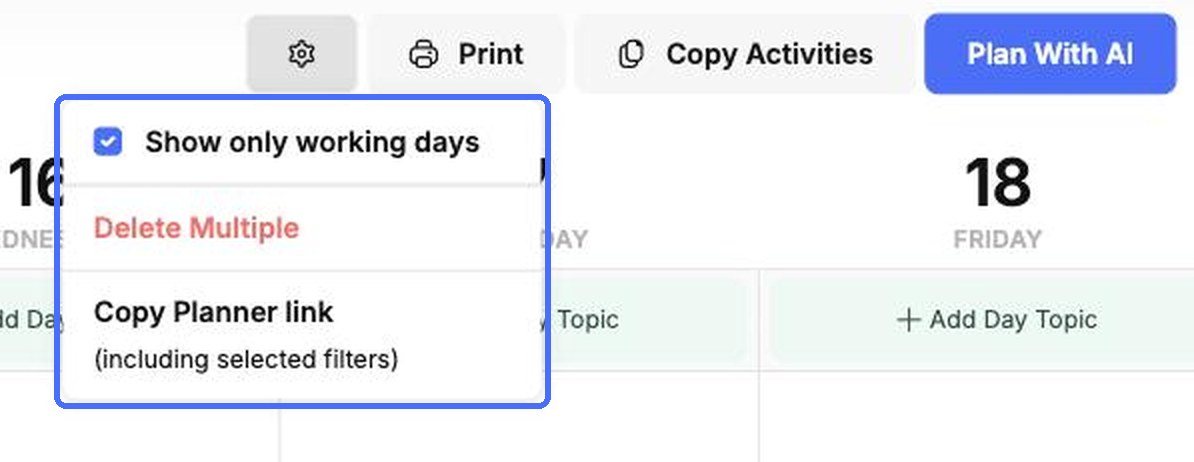
| Gear › Show only working days | Hides the weekend from the grid. |
| Gear › Delete Multiple | Lets you select several activities and delete them together. |
| Gear › Copy Planner link | Copies a link to the planner, including the filters you selected. |
| Prints the week's plan. | |
| Copy Activities | Copies the week's plans to other weeks. |
Copy a week to other weeks
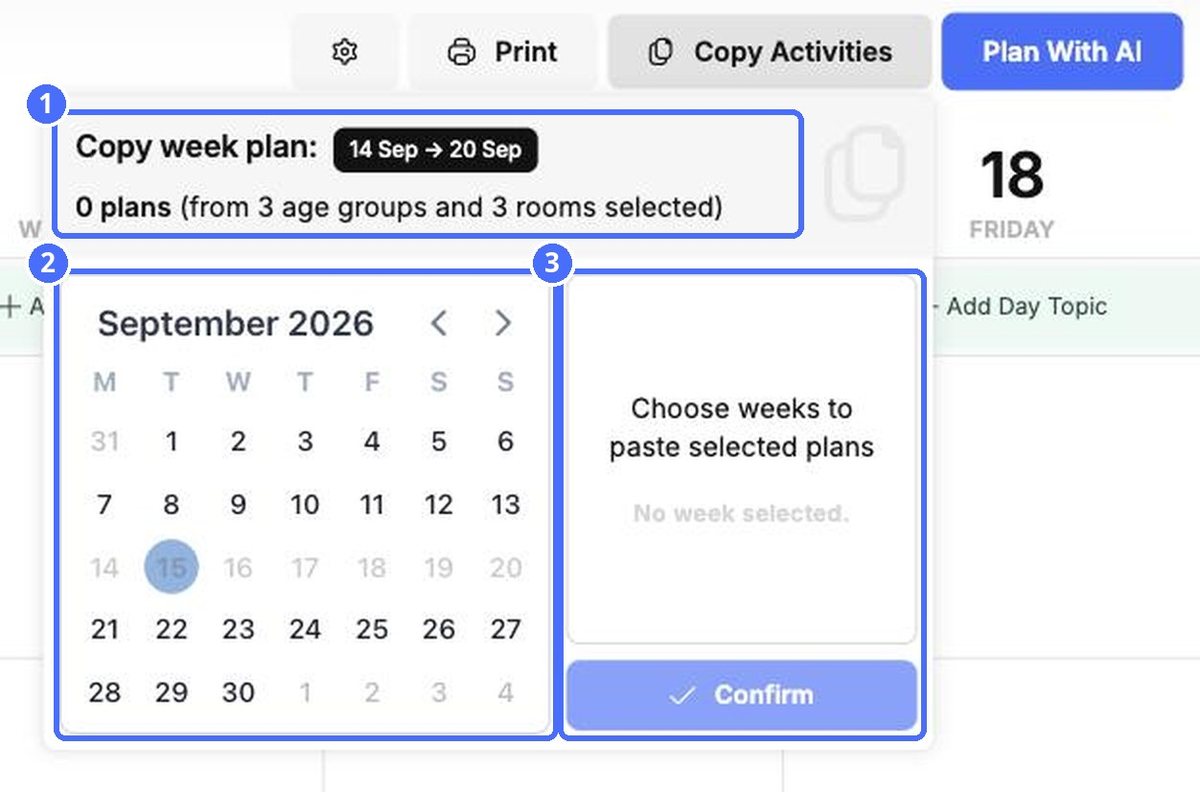
- Click Copy Activities. The top shows the week you are copying and how many plans it holds.
- Choose one or more weeks in the calendar. They appear on the right.
- Click Confirm.