Find and manage invoices
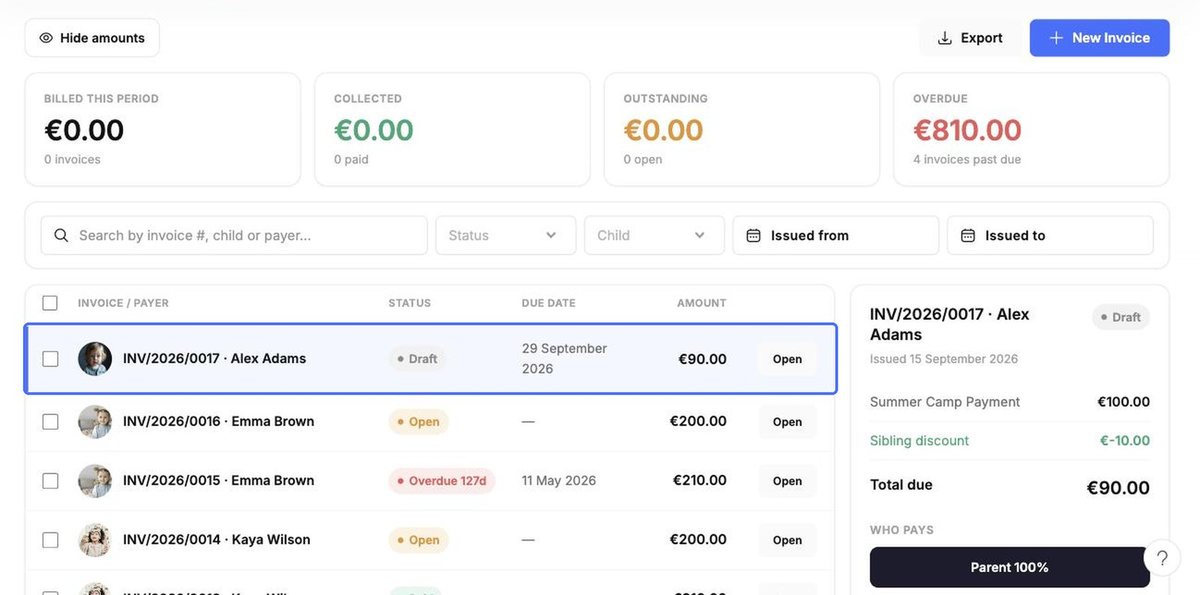
The Invoices tab shows billed, collected, outstanding and overdue totals for the period, followed by the invoice list.
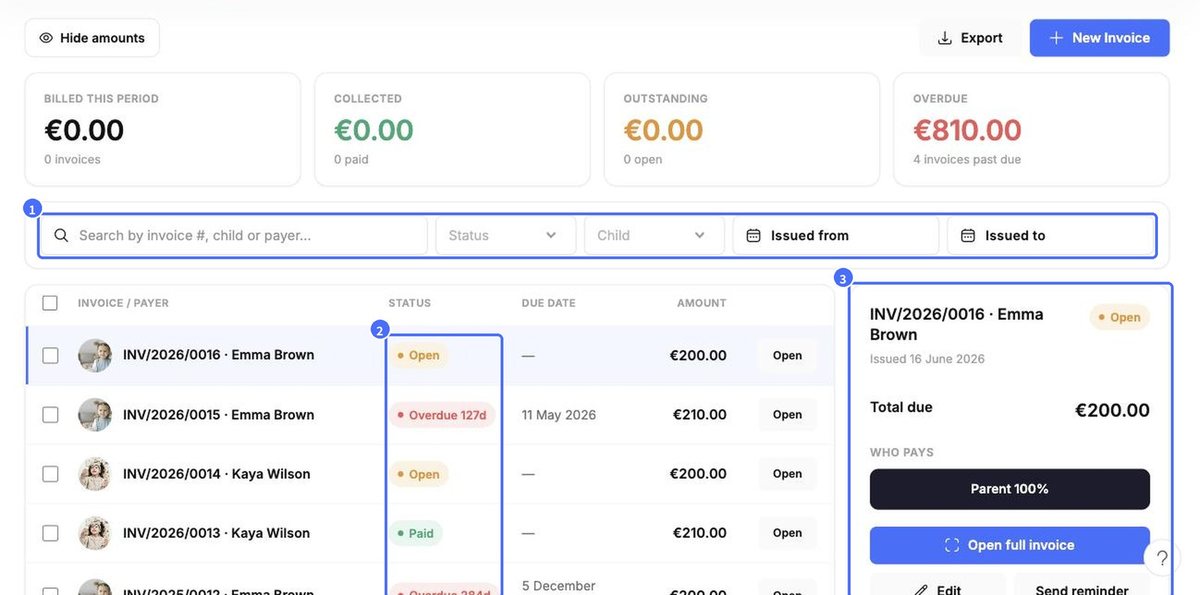
- Search by invoice number, child or payer, and filter by Status, Child or issue date.
- Each invoice shows a status: Open, Paid, Overdue (with days overdue), Draft or Canceled.
- Click an invoice to see its details on the right: line items, total due and who pays. From there you can Open full invoice, Edit, Send reminder or View full audit log.
- Use Export to download the list.
Create an invoice manually
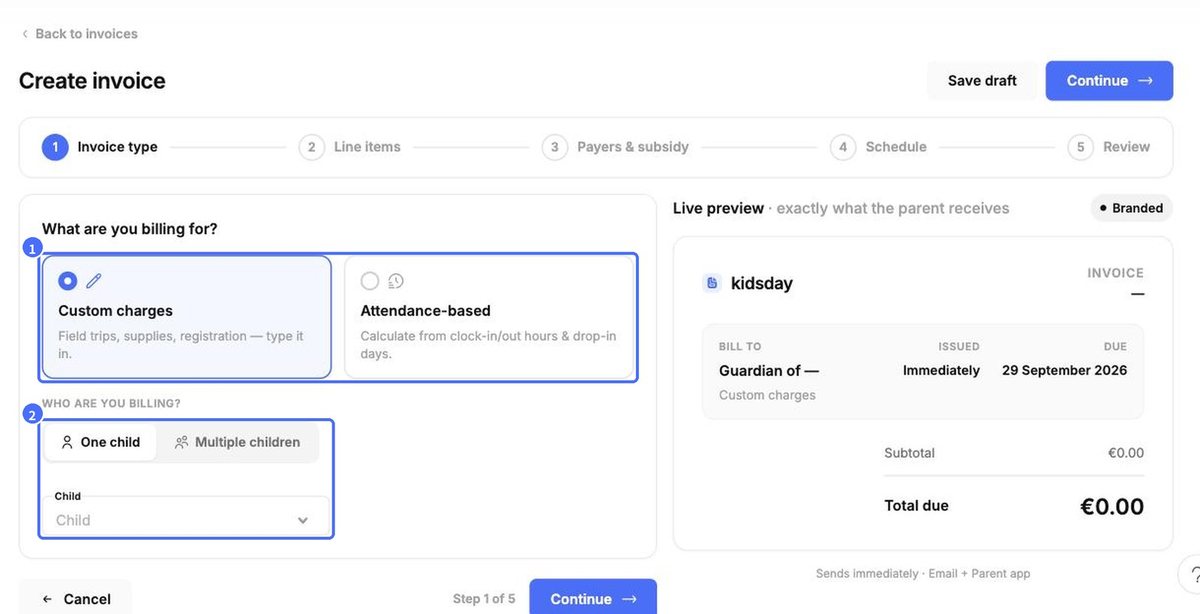
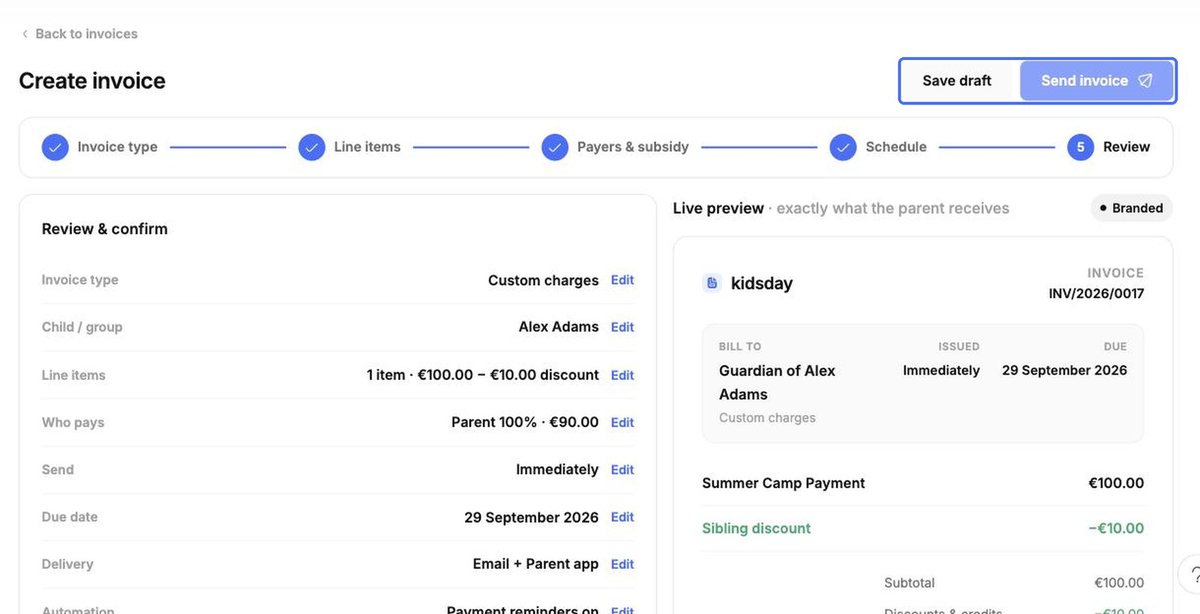
Plans create recurring invoices automatically. For one-off charges – trips, supplies, registration fees – create an invoice yourself. Click New Invoice and follow the five steps. The Live preview on the right updates as you go.
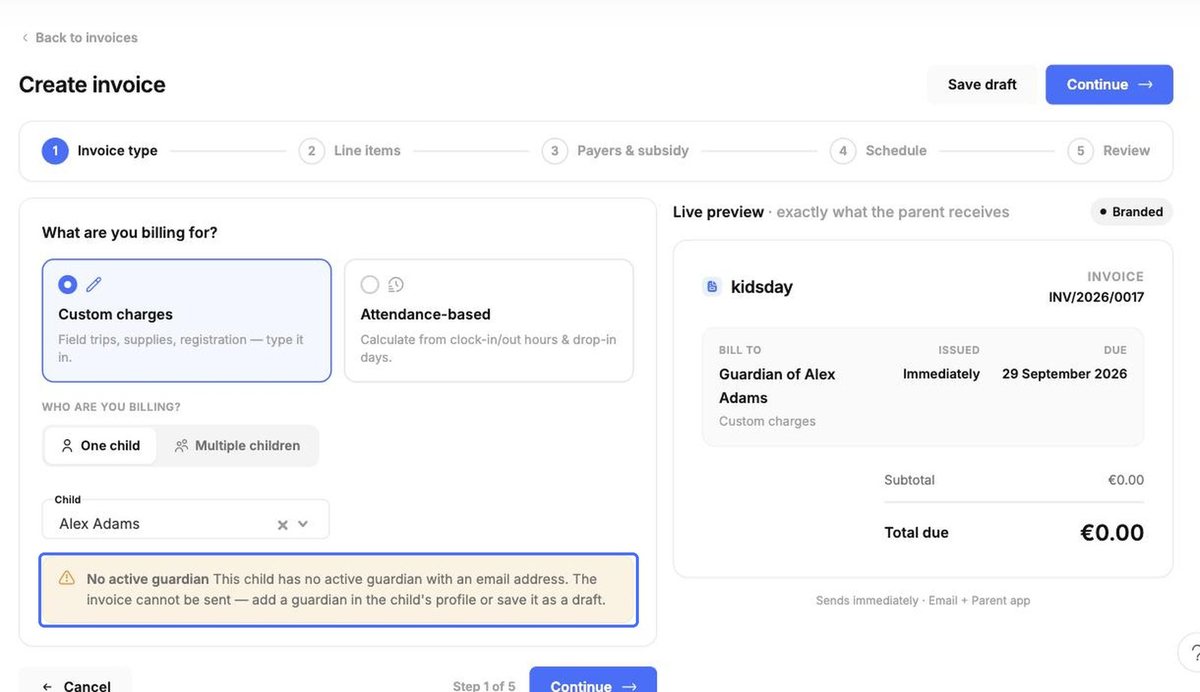
Step 1 – Invoice type. Choose Custom charges or Attendance-based (calculated from clock-in/out hours and drop-in days). Choose One child or Multiple children, select the child, and click Continue.
Note: If the child has no active guardian with an email address, kidsday shows a warning. The invoice cannot be sent until a guardian is added in the child’s profile, but you can save it as a draft.
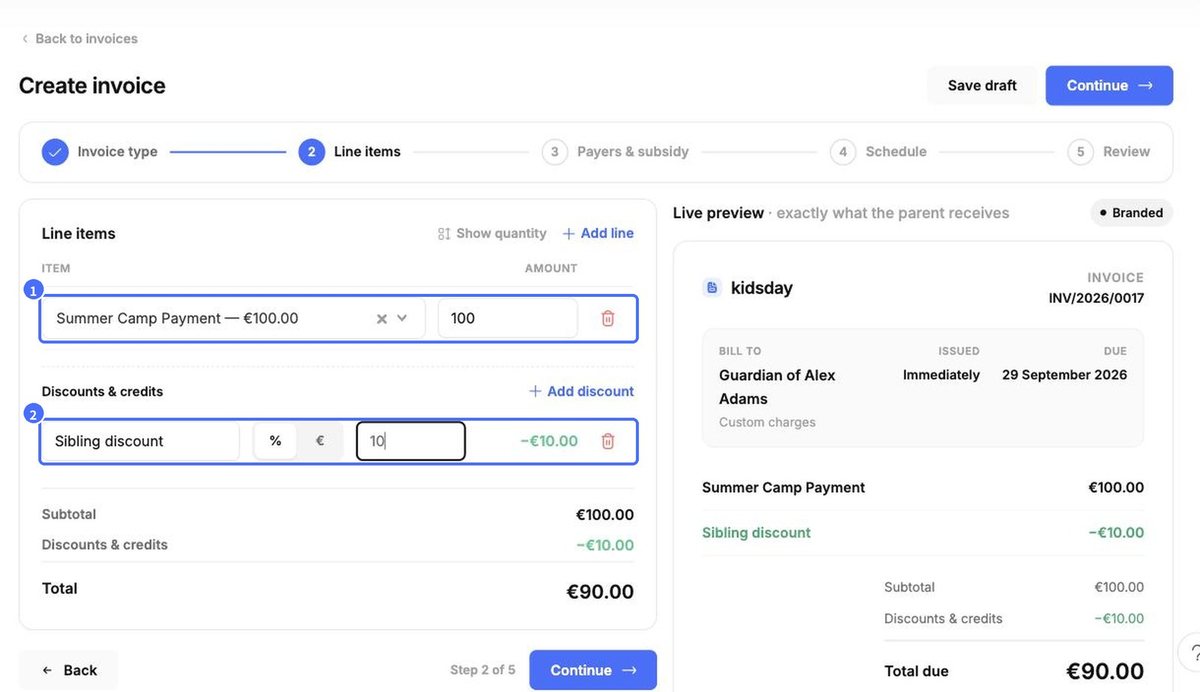
Step 2 – Line items. Click the Item field and choose an item from your price list (or type a new one); the amount fills in automatically and can be edited. Use Add line for more items, Show quantity to bill several units, and Add discount for a percentage or fixed discount.
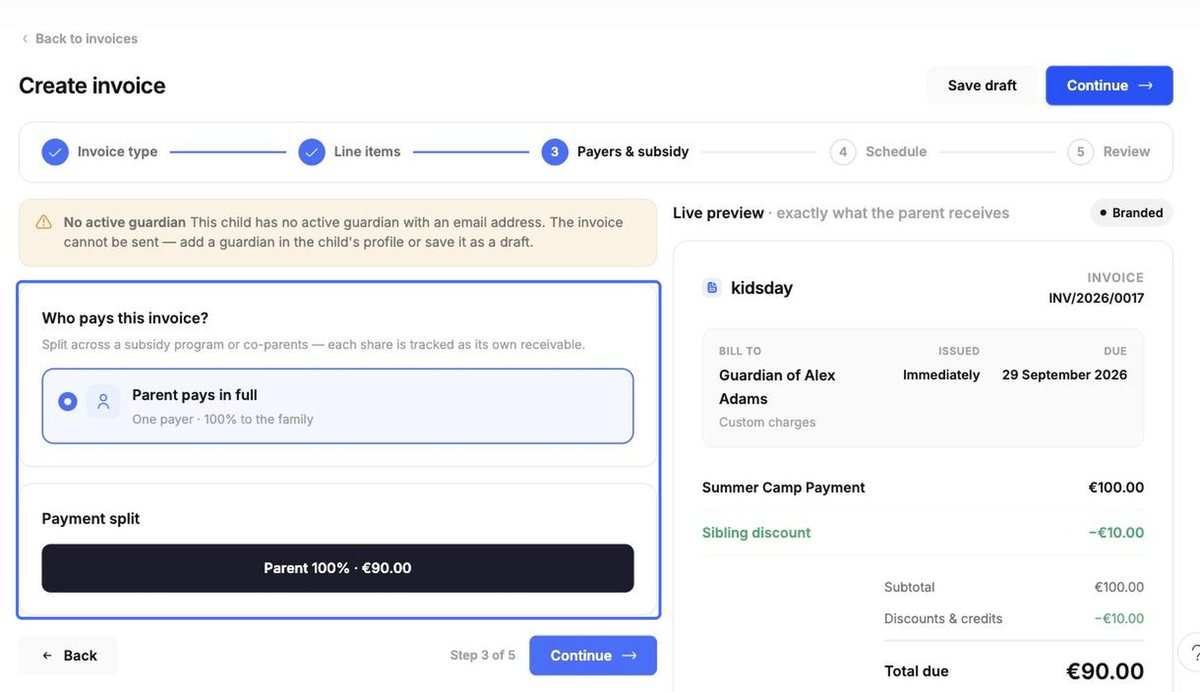
Step 3 – Payers & subsidy. Choose who pays: Parent pays in full, or Split between co-parents (any ratio). If subsidies are enabled, you can also split with a subsidy program. Tick which guardians receive the invoice.
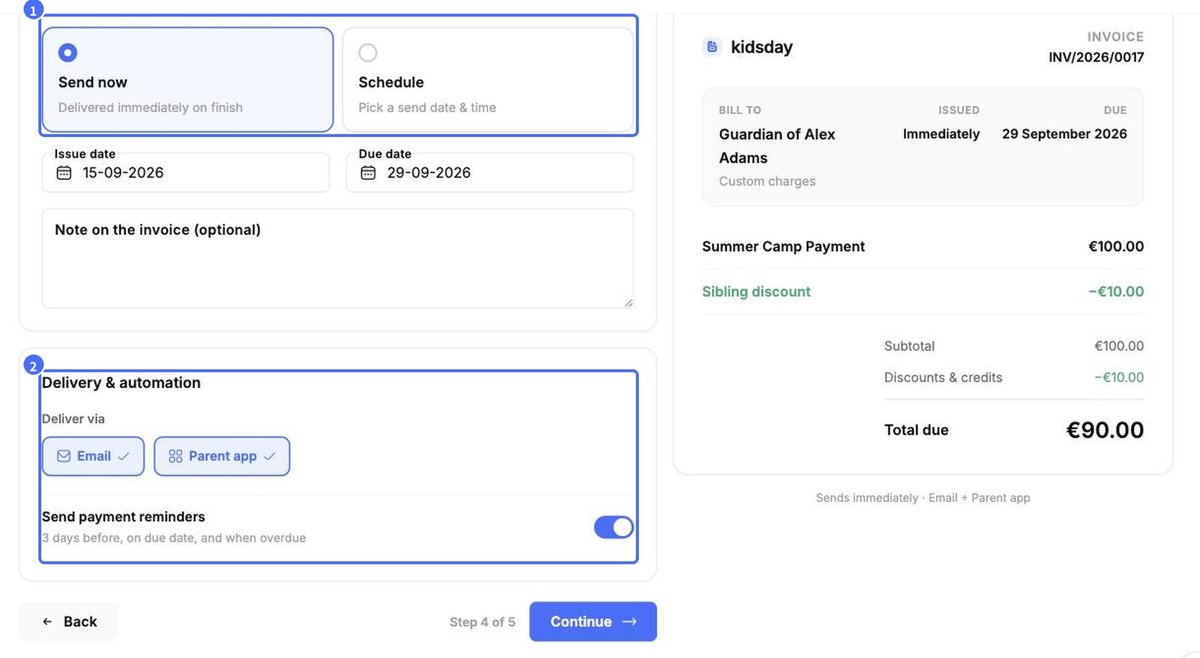
Step 4 – Schedule. Choose Send now or Schedule a send date, check the Issue date and Due date, and add an optional note. Under Delivery & automation, choose Email, Parent app or both, and whether to Send payment reminders (3 days before, on the due date and when overdue).
Step 5 – Review. Check the summary – use any Edit link to go back to a step – then click Send invoice, or Save draft to send it later.
The invoice now appears in the list (as Draft if you saved it without sending).